Thumb Joint Pain Relief
Providing your own thumb joint pain relief is absolutely something you can do, in most cases. And I'll take you through the the exact things you need to do in the videos on this page.

Everyday activities like computing, driving, holding an iPad for hours on end, or texting can often be the cause of the problem; as well as specific repetitive tasks or trauma to the area. Either way, I'll show you how to fix it.
The videos on this page will show you what to do, and in most cases you'll get the pain relief you've been seeking.
The 3 videos for Thumb Joint Pain Relief are below on this page.
Go directly to any video on this page by clicking these links:
Intro,
Video 1,
Video 2,
Video 3 .
Pain Relief Success Story, From Riva:
"You are my new favorite person in the world. I've had pain at the base of my thumbs for YEARS…which I was able to release by following along with your video... Thank you so much for your instructive and helpful videos." Riva, United States
You can do it too!
Click directly to any pain relief video on this page:
Intro,
Video 1,
Video 2,
Video 3 .
*Please Watch This Short Video First. Thanks.
Please visit the techniques page now, if you haven't already.
On the homepage I describe…in detail…the 3 Simple Steps and the 4 Basic Facts about your body that make it possible for you to provide your own joint pain relief.
Detailed Instructions For
Thumb Joint Pain Relief
Click directly to any thumb joint pain relief video on this page:
Intro, Video 1, Video 2, Video 3 .
Here's what we're going to do:
A. Release Thumb Joints -
Gently move your thumb in a way that will make your joint pain occur. As you move your thumb notice where you feel the movement restricted. Is it on the top near the knuckle or down closer to your wrist, or in some other location? Wherever you feel the restriction is where we want to begin working on your thumb.
If your pain is from a trauma to your thumb that happened a long time ago or even recently, such as jamming the joint or having it pulled or pushed in some awkward direction then this technique can work wonders. As long as you are sure you do not have fracture in the bone, then you'll want to work on the restricted area diligently.
If the thumb knuckles themselves are not restricted and painful, you can move on to the next technique.
We are going to do a combination of the press-hold-move technique and the press-pull-release technique to release any inappropriate tension you have in your thumb joint.
Just find a spot that is painful/tender when you press on it, which means the tissue is tight, and press on the tight spot while you move your thumb so that the tissue under your pressure is forced to move from the movement you make. This can be painful, but is the only one of two ways to get the tissue to release. This is the press-hold-move technique.
The other way is to press on the painful/tight tissue and then pull on it, like you are trying to sculpt some clay. This is the press-hold-move technique.
If the side of your thumb is where you feel the tension and painful tissue, then you'll use the same two techniques. It can take a little while, so be persistent. You may have to do a little everyday for it to finally let go.
How much thumb joint pain relief this one technique provide? Do you need to come back later and do more work?
B. Release Thumb Muscles in Palm Of Hand -
Take your thumb that is not experiencing thumb joint pain and press it into the fleshy part of your palm that connects to your thumb. Take your fingertips and place them on the other side of your thumb/hand so you press from both sides of your hand working with the tissue.
Start with the tissue along the edge of your thumb bone and slowly work your way outward to the middle of your hand while you do the press-hold-move technique and the press-pull-release technique on any tender tissue.
Now move to the tissue that makes the "web" between your thumb and fingers. Grab the tissue from both sides and do the press-hold-move technique and the press-pull-release technique on any tender tissue. Lastly, investigate a bit. Move your thumb in the way that makes it hurt, then press on the palm of your hand to figure out if there is a tight muscle in your palm that makes your thumb move it that particular manner. If yes, do the press-hold-move technique and the press-pull-release technique on that tissue until it releases.
Notice how much thumb joint pain relief this one technique provided.
C. Release Thumb Muscles in Forearm -
There are thumb muscles in your forearm that need to released.
Now do the press-hold-move technique. Press your good thumb into this lower part of your forearm while you move your painful thumb back and forth in a motion where you touch the lowest part of your pinky finger and then open your thumb out as wide as you can. Press on any tender spots while you do this until they release.
Notice how much thumb joint pain relief this one technique provided.
Second, Lay your hand with the painful thumb on your opposite thigh with the pinky side of your hand resting on your thigh and your thumb side of your hand facing the ceiling. Take your other thumb and press it into the "thumb side" of your lower forearm. And now raise your thumb straight up and down as you do the press-hold-move technique on any tender spots.
Notice how much thumb joint pain relief this one technique provided.
Third, with your hand still resting on your thigh in the same position, now take your fingertips and press them into the tissue on the other side of forearm bone (what you might consider "the top side of your forearm"). And now raise your thumb straight up and down as you do the press-hold-move technique on any tender spots.
Notice how much thumb joint pain relief this one technique provided.
Click directly to any thumb joint pain relief video on this page:
Intro,
Video 1,
Video 2,
Video 3 .
We need to make sure all the tissue on the C6 nerve pathway……the nerve that comes from the sixth neck vertebrae……is not being yanked, grabbed, or pulled inappropriately on it's way down to your thumb. This is especially important if you notice tingling or numbness in your thumb.
A. Release Back Of Neck -
We'll begin to release the back of your neck by using the press-hold-move technique.
Begin by placing the your fingertips from both hands on the back of your neck on either side of the spine. Generally, the fingertips from your right hand will be pressing into the tissue on the back right side of your neck, and the fingertips from your left hand will be pressing into the tissue on the left back side of your neck.
Investigate with your fingertips to find any painful/tender tissue when you press on it. Painful tissue when you press on it is "tight" tissue that needs to be released. Once you've found some tight tissue, press into with your fingertips while you make the tissue under your fingertips move by turning, twisting and nodding your head.
If you would like to add a little more firm pressure to a tight spot you can incorporate the hand-on-hand technique by simply taking your other hand and pressing on your fingertips that are already on the tight spot. Sometimes, just that little extra bit of pressure will help that tissue release as you move your head around.
Each spot may react a little differently. Some tissue will release right away and some may take more time. And some tissue will require that you move on to other areas and then return later, but it should eventually let go if you keep at it. Sometimes you have to release other areas (upper neck, shoulder girdle, etc.) for the tissue to finally let go.
And make sure to investigate and release the tissue on both sides of the neck.
Pay attention to how much this reduces your thumb joint pain.
B. Shoulder Neck Release -
Now take your fingertips from one hand hang them over your shoulder where your neck and shoulder intersect. Use the press-hold-move technique to release any tight tissue you find here.
You can turn and tilt your head, shrug your forward and back, backward and forward, and even move your arm in big circles (I usually keep my elbow bent while I do the circles). Again, the goal is to get whatever tissue you are pressing on to move while you continue to press on it.
Just notice what motion seems to work and do as many repetitions as you feel like. But then keep investigating other motions as the tissue releases. And feel free to leave a stubborn spot for a while and then return later to see it will then release after you gotten other things to release.
If this area is particularly stubborn, feel free to visit the main neck and shoulder pain relief page. It will give you a few more specific techniques to release this area.
Notice any effect your thumb joint pain from this technique.
C. Outer Side of Arm Release -
Take your fingertips from your non-painful hand and place them on your outer upper arm, just below your shoulder muscles. Press on this tissue from your shoulder muscles all the way down to your elbow and notice any tender tissue.
Now do the press-pull-release technique on any tender tissue you find until it releases.
Notice the amount of thumb joint pain relief this provides.
D. Release Elbow Joint -
Take your thumb from the hand that does not hurt and press it into the front outer half of your elbow joint. There is a muscle here called your brachioradialis that can be a factor in causing thumb joint pain.
If it is tender do the press-hold-move technique by bending and straightening your elbow.
You can also add the press-pull-release technique to help this muscle release.
Notice the amount of thumb joint pain relief this provides.
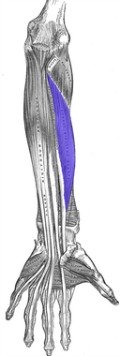
E. Both Sides of Radius Release -
Place your injured thumb hand on your lap with your palm facing upward. Take your other hand press on the outside edge of your forearm, and feel your forearm bone that is on the "thumb side" of your forearm. This is your radius bone.
Next, take your hand and turn it so the pinky side of your hand is resting on your thigh. Feel your radius bone again from the bottom of your thumb up to your elbow.
Now take your other thumb and press it into the muscle tissue along the inner side of the radius bone. Do the press-hold-move technique by raising and lowering your thumb while your press on any tender tissue.
Lastly, take your fingertips and press them into the tissue on the outside edge of your radius bone from the bottom of your painful thumb all the way up to your elbow and notice any tender tissue. Do the press-hold-move technique by raising and lowering your thumb while your press on any tender tissue.
Notice the amount of thumb joint pain relief this technique and all of Step 2 provides for future reference.
Click directly to any thumb joint pain relief video on this page:
Intro,
Video 1,
Video 2,
Video 3 .
Now we just want to make sure the other muscles in the palm of your hand and in your forearm are not negatively affecting your thumb.
Here's what we're going to do:
A. Release Pinky Side Of Palm -
Hold your injured thumb hand in front of you with the palm of your hand facing you. Now take your other thumb and press it into the tissue on the pinky side of your palm. Press around from your wrist out to the edge of your palm and notice any tender tissue.
Now, do the press-hold-move technique while you move your thumb in the way that makes it hurt.
Notice how much thumb joint pain relief this technique provides.
B. Forearm Release With Thumb -
We'll be using the press-hold-move technique to release the muscles in your forearm that may be negatively affecting your thumb.
Rest the forearm that you want to work with on your lap or on a firm surface where you can easily work on it with your other hand. Take your thumb from your opposite hand and begin pressing it into to tissue in your forearm to find any spots that are painful and/or tender. This means the tissue in that spot is tight and needs to be released.
Once you find some tight tissue, do the press-hold-move technique by pressing into the tissue with your thumb while you open and close your hand. Make sure to use your thumb when you open and close your hand with each repetition.
And now notice the amount thumb joint pain relief you get from this technique.
You can go through you entire forearm with this technique and get a lot of benefit, but feel free to take a break if you thumb gets too tired. Or alternate with the next technique I'm about to show you.
C. Forearm Release With Opposite Forearm -
This is my "go to" technique after a long day of bodywork! It has helped my wrists and thumbs tremendously over the years.
Now we'll do the press-hold-move technique. Just like we did with your thumb applying the pressure, now you'll use your opposite forearm to apply the pressure. Don't use the point of your elbow. Apply the pressure with two to three inches of your forearm bone just below the point of your elbow.
Just poke around with your elbow to locate tight tissue, then press into the tissue while you open and close your hand.
Make note of how much your thumb joint pain has improved from doing this technique.
You can do this on your forearm multiple times before moving on.
D. Top of Forearm Release With Fingertips -
We'll continue using the press-hold-move technique when we release the top of your forearm. Start by using your fingertips to locate and then release any tight tissue.
Flex your fingers and wrist back and forth as you press into any tight tissue. This can be tiring for both your fingertips and the muscles in the top of your forearm, so feel free to take a break or two as you go through releasing the tissue.
Did this technique help your thumb joint pain? Make a mental note of how much.
E. Top of Forearm Release With Point of Elbow -
For the really deep or stubborn areas of tight tissue where you need a bit more pressure, you can use the point of your elbow to gently, but firmly press into the tissue and do a press-hold-move technique.
Take the point of your elbow from your opposite arm and press it into the tight tissue while you flex your fingers and wrist back and forth. Do this on all the remaining tight tissue in the top of your forearm.
Has your thumb joint pain has improved? Make a mental note of how much.
Self-Assessment For
Thumb Joint Pain Relief
Thumbs can sometimes be a bit tricky to get at the causes of your pain, but if you stick with it, you'll get there. Many times our new modern devices can be a big culprit in causing your thumb joint pain. Holding iPads and tablets, texting on smart phones , gamers playing for hours on end, all these things can play a role in your thumb pain, so please pay attention to how those activities affect the amount of thumb pain you experience and adjust accordingly.
Soooo.....
How much thumb joint pain remains after going through all the videos?
Which techniques gave you the most pain relief?
Which of the three steps seemed to provide the most thumb joint pain relief?
Did one technique instantly relieved your pain?
Are some areas still tight and need more work?
Make note of what worked well and what areas needs more work. Go at your own pace, but keep at it and you'll soon have the thumb joint pain relief you've been seeking.
Great job by you. Keep up the good work!
Return from this Thumb Joint Pain Relief page to the
Do-It-Yourself Joint Pain Relief Homepage
More Thumb Joint Pain Relief Success, From Nick
"Thanks so much for your detailed and productive guidance. I've been dealing w/ some repetitive motion issues in my elbow, forearm, wrist and thumb. During the last few days the thumb joint has been excruciating . lo and behold i find your website, follow all 4 videos and get instant relief that carried over to the next day. Your techniques of movement while massaging are really successful and the straight forward and practical approach is a home run. Thanks again." - Nick, United States
This Free Pain Relief Website
By Clicking On Your Favorite Icon Below:
Add Gary Crowley to your Google Plus Circles -
Google+ (click here)
Copyright © 2011 - 2022 DiyJointPainRelief.com


