Shin Splints Treatment
Just follow along with the videos below.
Go directly to any Shin Splints Treatment video with these links:
Intro,
Video 1,
Video 2,
Video 3 .
Pain Relief Success Story, From Brett:
"...I wish I had known about these techniques in High School and my shin splints would have been a thing of the past. I still get those when driving a lot and just today used the... technique to ease the pain and in less than a minute it was virtually gone. I can't believe how simple. Thanks again!" Brett, United States
You can do it too!
Click directly to any pain relief video on this page:
Intro, Video 1, Video 2, Video 3 .
*Please Watch This Short Video First. Thanks.
Please visit the techniques page now, if you haven't already.
On the homepage I describe…in detail…the 3 Simple Steps and the 4 Basic Facts about your body that make it possible for you to provide your own shin splint symptoms pain relief.
Detailed Instructions For
Shin Splints Treatment
Click directly to any pain relief video on this page:
Intro,
Video 1,
Video 2,
Video 3 .
Here's what we're going to do:
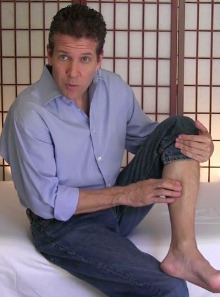
A. Inside of Shin Release - Tibialis Posterior
Perform the press-hold-move technique and the press-pull-release technique on any tight tissue you find.
How effective is this one technique as a shin splints treatment.
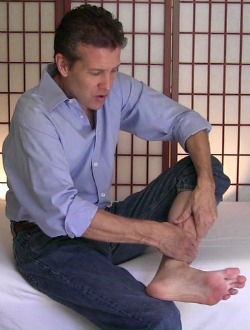
B. Front of Shin Release - Tibialis Anterior
hand-on-hand technique along with the press-hold-move technique to undo any tight/painful/tender tissue you may find.
This can be a lot of work if this muscle is tight, so please do pace yourself. If your fingers and hands get tired then take a break.
Notice how effective this one technique is as a shin splints treatment.
Click directly to any pain relief video on this page:
Intro,
Video 1,
Video 2,
Video 3 .
All the muscles that attach to your two lower leg bones need to be appropriately free in order for your lower leg to function properly and eliminate your shin splint symptoms. We already did the two of them in step one, so now we'll do the two other main players in your lower leg. Releasing these will only help whatever is going on.
Here's what we're going to do:
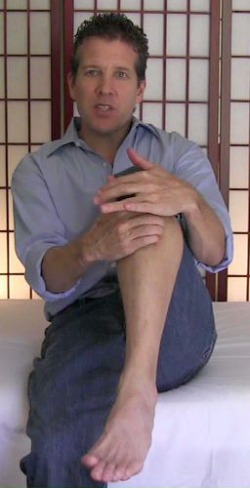
A. Outer Lower Leg Release -
Once again we'll be using the hand-on-hand techniqueand the press-hold-move technique to release the muscles on the very outside edge of your lower leg.
The press-pull-release technique is also a very viable option with these muscles. You can alternate techniques and see if one works better than the other, or if the combination of the two works better.
How is this as a shin splints treatment?
B. Calf Stretch (do this stretch slowly) -
As I say in the video, and I'll say here again, "Please, GO SLOWLY" with this stretch.
And as you are going slowly, just make sure your calf muscle in engaged a bit while you are stretching it. This is a great stretch. I just want you to be careful.
For even more effective ways to stretch your calves, please visit my Best Hamstring Stretches (click here) page.
Notice how effective this one technique is as a shin splints treatment.
Video 2b - Bottom Of Foot Release - I've added this one shin splints treatment technique just in case your shin splint symptoms still linger a bit after doing all to above.
A. Bottom of Foot Release -
Using primarily your thumbs, do thepress-pull-release technique on the tissue you find in the bottom of your foot that is painful when you press on it.
If your thumbs become fatiqued, take a few minutes off, or even a few hours off if you need it.
You can also do the press-hold-move technique on this same area while you flex your toes and hold on one spot.
Do at least 2 more rounds on the bottom of your foot before moving on to Step 3.
Another option is to use the hand-on-hand technique, the press-pull-release technique and the press-hold-move technique to get into and release the bottom of your foot.
Notice how much effective this one technique is as a shin splints treatment.
The tennis-ball-press technique is another way to work on the bottom of your foot and something you can do while working at your desk.
Click directly to any pain relief video on this page:
Intro,
Video 1,
Video 2,
Video 3 .
Here's what we're going to do:
A. Reclined Hip Stretch -
Please watch the video for this stretch and take the time to learn to do it properly. The key is the remember that it's the arm on the same side as the leg that is crossed that you shoot over your shin. Then the other arm goes between your legs to grab the first arm.
B. Seated Hip Stretch -
The most important thing to remember with this stretch is that you want to feel the stretch deep in your hip or in the groin and hamstring of your front leg. If you happen to feel this stretch in your knee at all, then take a moment to readjust the position of your front foot until you no longer feel your knee.
C. Hamstring Stretch -
1. Legs always remain straight
2. Thighs are always flexing while doing this stretch
3. For even more hamstring stretch information, please visit my Best Hamstring Stretches (click here) page.
Self-Assessment Of
Shin Splints Treatment
Which shin splints treatment gave you the most relief?
Did Step 1, Step 2, or Step 3 work best?
Was there one specific shin splints treatment that instantly relieved your pain? Remember what worked best for you, so you can do that first next time you need it.
Are you still experiencing some shin splint symptoms?
Which muscles are still tender (that means they are too tight!) and could use some more work?
Go back and repeat those techniques that seem to need a few more rounds. You may be pleasantly surprised at the results you get now that you've released other muscles that may prevented them letting go on the first attempt.
Investigate a bit and you'll eventually find which specific shin splints treatment techniques work best for you to provide the most relief relief. Then you'll be able to fix yourself whenever you desire because you'll have your own personalized shin splints treatment……literally at your fingertips!
The Foot Pain Relief page (click here) can be added if your shin splint symptoms still remain. Releasing the bottom of your foot, in particular, may be important in your case.
Return from this Shin Splints Treatment page to the
Do-It-Yourself Joint Pain Relief Homepage
"Hi Gary, I see a PT every 6 weeks for a 2 hour session and she keeps my back and body in good shape. However I've always wished I could fix my self for the time in between visits when I sit for too long or pull something. I've been taking Zumba for years and recently pulled a tendon so bad in my foot it Charley Horsed. on me and could not walk. Desperate to fix it I found your website. I realized from your site I had posterior shin splints. My primary care dr confirmed this. My PT couldn't fit me in for a week so I did your videos for past week for shin splints and am off crutches and walking normally! I can't thank you enough for sharing your expertise on your site. You do great work!" - from Cat, in the USA
This Free Pain Relief Website
By Clicking On Your Favorite Icon Below:
Add Gary Crowley to your Google Plus Circles -
Google+ (click here)
Copyright © 2011 - 2022 DiyJointPainRelief.com


